
The January 2014 Daring Bakers’ challenge was hosted by Francijn of “Koken in de Brouwerij.” She challenged us all to bake layered cakes in the tradition of Baumkuchen (tree cake) and Schichttorte (layered cake). And many of the Daring Bakers took the challenge and ran with it. Versions ranged from the provided recipe, which contained marzipan to alternating chocolate vanilla versions, chocolate-orange versions, and everything in between. Me, I opted to do a lemon cake with a lemon cream cheese glaze topped off with a sprig of rosemary.
And…yeah…okay. I cheated. I used a–mm hmm– a cake mix. There, I said it. All of the cooking and baking I’ve done lately– risotto, arancini. cinnamon rolls (twice– I know, I know), stuffed and baked manicotti, and even a mile-high lemon meringue pie– and I just didn’t have it in me to whip and beat one more thing. And since the challenge was the method and not the recipe, I opted for the easy way out. But I did make my own glaze. That makes it okay, right?
The method, while a bit time-consuming, wasn’t all that difficult. Pour a little of the batter in a pan and bake it at a really high temperature for a really short amount of time, and then do it all over again nine to eleven more times. The result is several very thin layers of cake. Many of the final Bakers’ results were stunning to say the least. My layers were a little more subtle. They were there, but you had to look for them. Next time maybe a layer of vanilla batter and a layer of lemon batter. Or perhaps, I shouldn’t use a cake mix.
I am hanging my head in shame. Of course, it’s hovering over a plate of deliciousness. Shameful deliciousness that wouldn’t be as good as homemade. But still.
NOTE: This was supposed to go up on January 27th, and I had this almost typed for reveal day. Then I got the flu. Not quite as fun as making the cake was.

Lemon Schichttorte
Ingredients:
Cake:
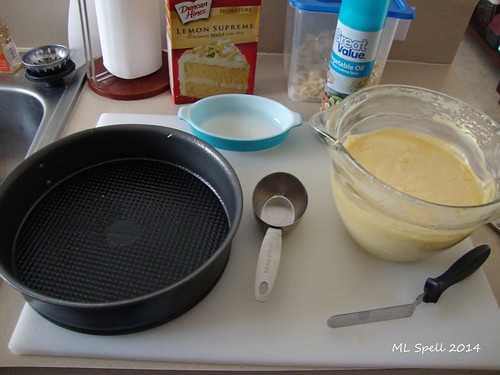
1 box Duncan Hines Lemon Cake Mix
2 large eggs
1 cup water
1/3 cup oil
Glaze:
2 oz. cream cheese, room temperature
1 cup powdered sugar
1 tsp. lemon zest
1 tbsp. fresh lemon juice, more if needed
1 sprig rosemary (optional)
Directions:
Pre-heat the oven to 450 degrees F. So very hot, but it worked.
Prepare a 10-inch spring form pan, spraying the insides with cooking spray (or whatever it is you use to make your cakes not stick). Make sure that your pan is safe to use in a high temperature oven. The same goes if you decide to use parchment paper. Some aren’t safe to use over certain temperatures and can catch fire in the oven.
Combine the cake mix, eggs, oil, and water in a mixing bowl.

Mix it however you mix your boxed cake mix. I used a hand mixer for mine, following package instructions.
Now you have to do a little math. Determine how much batter you have and how many layers you want. I ended up with approximately 5 cups of batter, so I opted to use 1/2 cups of batter for each layer. This gave me approximately 10 layers, though the 10th layer was very thin due to lost batter along the way (not to fingers, just natural drippage).
Pour your desired amount of batter into the bottom of the pan,

and spread it around as evenly as you can. This pan is beautiful for cheesecakes as the grid holds a crumb crust beautifully, but the grid make the first layer a little difficult to spread.
Looks good here,

but you can see the uneven spots here.

When your pan is ready and the oven is to temperature, bake it for 4 minutes. Set your timer and find some chore to do in the kitchen– like making the glaze.
Hey– make the glaze! In a small bowl, gradually add the powdered sugar (1/4 cup at a time) to the cream cheese, then stir in the lemon zest and lemon juice until you reach whatever consistency your heart or taste buds or stomach desires. Easy peasy.
When the timer goes off, remove the cake from the oven,

and pour the next layer over the baked layer.

And do it all over again: batter, spread, oven, timer for 4 minutes, work on glaze, beep!, remove it again. It’s all very lather, rinse, repeat. At least until you run out of batter.

And your cake will get taller and taller.

When you’re all done, about 40 minutes to an hour later (believe it or not, you can get a lot done in the kitchen during those four-minute intervals), let the cake cool for about 10 minutes. Then run a knife carefully around the inside rim of the pan to loosen the cake for the sides.

Then remove the outside collar of the pan, and you get…this:

Strange, no? Not really. Normally, I might be a little freaked by the weirdly charred exterior, but this is just part of the baking process. So what to do? Let it cool all the way– at least an hour– and trim the char.
Not willing to stress over a perfect circle, I opted to turn mine into a square.

Pretty easy…and messy.

But you can kind of see the layers. And the bottom is a bit burned, but you can trim that off if you want. It actually tasted more caramelized than burned, though.

Then pour your glaze over the top.

And top it with some rosemary. I initially did it because the cake needed something, but in the end I decided that flavor combination was pretty delicious even for a cake. Next time I’ll chop about a teaspoon of rosemary and add it directly to the glaze.

As I said earlier, the layers are a little difficult to see, but they are there.
And it was pretty tasty. Best of all, I determined the cooking method worked on a boxed mix just fine, which gives me faith that it might work on other homemade cakes just as well.

Either way, it was a fun experiment! If you have a lot of patience, try it sometime!


